Posts

Week 15 Update

 So this week did not go at all as planned for obvious reasons, but I've been attempting to stay busy. As I showed in class on Thursday, I have the crank installed with the 3D printed backing part and it is pretty secure. I also tested the projector with transfer paper as the screen and it looks good. I also made a topper for the switch part this week and it fits/functions, but I might reprint it to be a little bigger just for aesthetics. . Thursday evening, I decided to go home to be with my family and luckily for me, my dad owns a soldering iron and solder sucker, so I was able to remove all of the old solder off of the switch part and apply fresh wires to what is (hopefully) the correct connections. Next steps are figuring out how to make that work with the arduino and mounting it into the board I have. I would like to overlay the ads with sounds that change as someone moves the switch, kind of inspired by shifting gears in the car. I also like the idea of making the switch alte...

Week 14 Update

Image
EDIT: Just fixed the issue I describe below. Rather than having two movie files, I just have two out tops connected to one file and replaced the paths of each file with those. Yay. I am really excited about the setup that I have in touch designer for project 2, but there are a few issues I still cant resolve. I went in today to try and add on more elements for the other sliders and things I have to go along with the crank, but I realized that only a short portion of the long video was playing on loop. I guess in my attempt to sync the two videos for the blur effect to work, it ended up locking them to the timeline and they both reset after the first 10 seconds or so. I'm now back to having the full video play but dealing with the same issue I had before where I can't get them to line up. I've spent about an hour trying different things and am still stuck. Also, I filed down the edges of my 3d printed crank bit, but it still doesn't fit nicely, so I think I am going to j...

Week 13 Update

Image
 Short post today because I don’t have much to show for what I’ve been working on, but I made progress on both the lab and progressing through my project idea.  Here is the soldered version of my power supply motor setup working:    This will be helpful for my project, as I’ve decided to make a conglomerate object that highlights some of the unique mechanical aspects of my old car. I’m envisioning something that sort of hums and / or vibrates on its own, the intensity of which changes based on interactivity. I thought of doing some kind of pedal that’s separate from the object to lean more into the car concept, but I think that might be too difficult to accomplish with the time constraints given that it would probably have to be wirelessly connected to the object. So I’m kind of stuck on what kind of interactivity I want and how it takes shape. Regardless, I found two really small pulleys with belts that are supposed to be used as 3D printer parts, so I can incorpora...

Week 12 Update

Image
 Lots to go over!  Labs I couldn't get the shift register lab to work after a few tries, but I'm giving it another go before our next class and hopefully it will work. The concept makes total sense to me, so it must be a tiny mistake somewhere that I just couldn't identify. I took a break from it and got started on the final lab earlier today, and completed the first task quickly with no issues (you'll have to take my word that the light is blinking). I still don't *totally* understand what a transistor is/does, but I'm sure moving through the rest of the lab next week will help. Projects  Before Thursday, I was feeling stuck on ideas for project 2, mainly because I know I will simultaneously be working on my typewriter and I don't want to over commit / under deliver on either side of things. While I don't yet have any more "deliverables" on what project two could look like, I do have a potential concept that I will explain here:      My relati...

Crit 1 Prep Update

Image
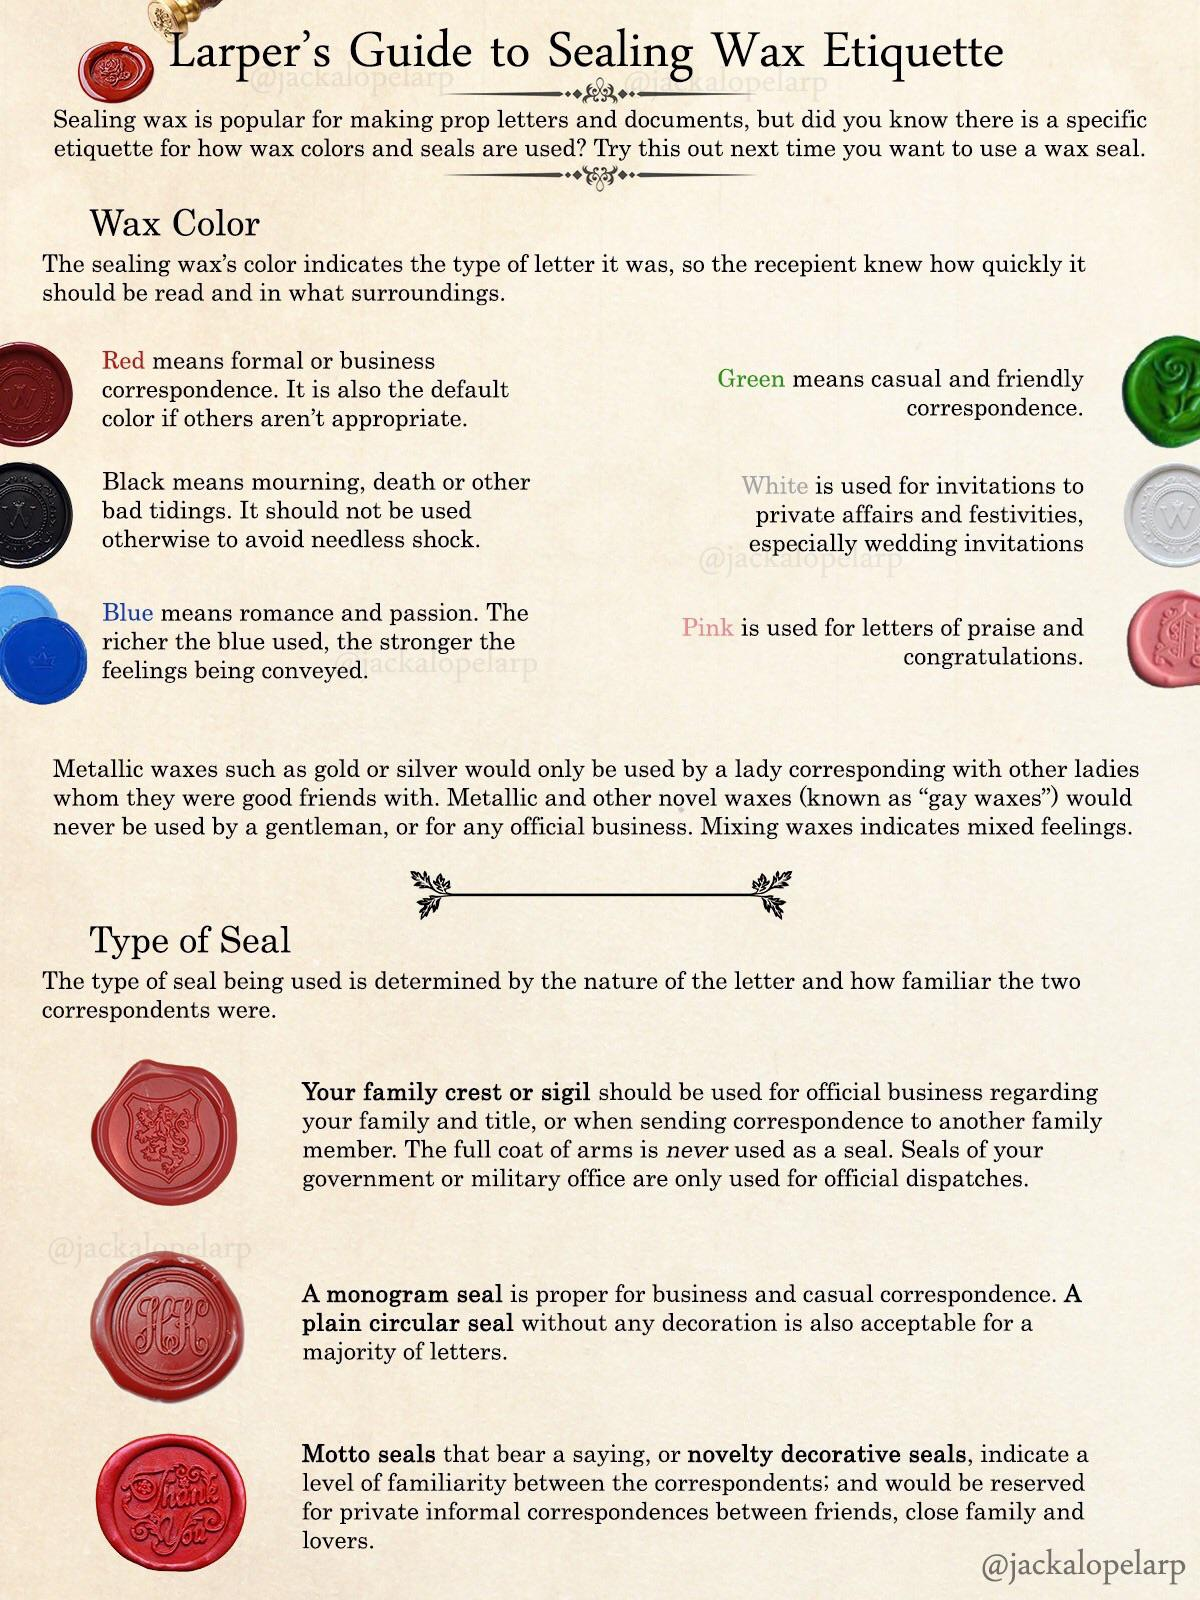
 Yay!! Progress!! I didn't have computer access over break, but I was able to refine my idea and adapt based on the limitations that came up along the way. I went back to the very beginning and tried to stop thinking about anything technical in order to nail down why I chose this project in the first place, and I gathered a few key concepts:  the importance of visual / physical communication the contrast between vintage and evolving methods of communication (injecting technology into foreign places)  the emotional implications of / sentimental value behind how we communicate In order to make this clearer and get the message across better, I decided to add the tactile element of having the user create a wax seal associated with the letter that they type, with a color key based on the sentiment score that gets picked up by the program. I did some research about the historical uses of different wax colors and created a start-to-finish process of how to interact with my piece...

Pre-Spring Break Update

 I’m writing from my phone in Denmark, so it’s a little difficult to provide any substance to show for this week, but this week has been lots of progress with also lots of setbacks…. First off, I finally got the measurements correct on the typewriter and it lined up well with the printout of the circuit board model, so technically the actual typewriter part is done and just a waiting game at this point (aside from adding a piece for the space bar).  My biggest issue right now is navigating the logistics of the experience, especially since the sentiment analysis can’t happen gradually in a way that still captures the content of what’s being written in a way that makes sense. To be honest, I’m still struggling to understand where I can go from here and have come up dry so far. I’m trying to think of an adapted vision for the final output and I think I just need to give it more time. The main bit of the concept that I really don’t want to lose is the mail slot, because my main fo...

Update and Code Dump

 I spent a little bit of time today trying new versions of the shapes on fusion / illustrator and still haven't gotten it quite right. Tomorrow, I'm going to spend as long as it takes until its correct. Woohoo!  It has been really frustrating so I took a break from measuring over the course of the week and researched some code that I will need to move forward once I have the correct circuit board. Most of it is a collaboration of chatgpt and my edits, and it will require more edits once I have all the parts and it is working for real, but I'm going to dump my drafts here.  This is the hypothetical sequence to turn the connection signals into the actual characters with 5 shift registers. I know I found some code online for this before, but that was designed for switches and this involves pull-up resistors so it should be debounced:  // Pin configuration for the shift registers const int latchPin = 9; // Latch pin connected to Arduino pin 9 const int clockPin = 10; //...